Maintaining your own sourdough starter is an ancient skill that unfortunately is fading away in today’s world. The process of making a sourdough starter is actually quite simple, and most traditional sourdough starter recipe contains just two ingredients: water and flour. With proper care, a sourdough starter can last forever.

While most women can bake, it is true that only a few bake with sourdough, isn’t it? Usually, people buy yeast packets from the store and use them to leaven the dough. Although I admit I have a few packets of dry yeast in my kitchen pantry, I never use yeast when preparing food. I used to buy it in bulk, but since I no longer use it, it just sits there for no reason.
Before starting, come and follow me on Instagram, Facebook, and Pinterest!
What Is a Sourdough Starter?
Essentially, a homemade sourdough starter and regular yeast are very similar. They both contain similar microflora that leavens the dough. However, commercial yeast is considered an industrial leavening agent, while a sourdough starter is a natural leavening agent containing wild yeast. In my opinion, a sourdough starter has numerous advantages.
As I mentioned earlier, a regular sourdough starter consists of only two components: flour and water. Sourdough starter can have varying hydration levels, but typically, it contains an equal amount of water and flour. There are many different methods for making sourdough starter. For example, it can be made from cocoa powder, potatoes, and sugar can be added to the starter. Each type of sourdough starter serves a different purpose.
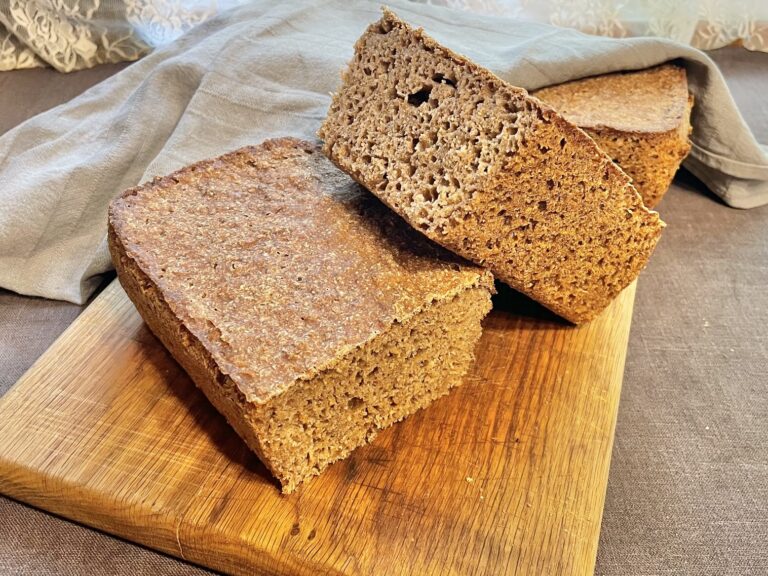
The type of flour used in sourdough can also vary, ranging from whole wheat flour to rye flour. Even gluten-free sourdough starter can be made. While sourdough statrer is typically used to make homemade bread, it can be used to create various baked goods, such as pastries and strudels.
Additionally, sourdough can be utilized in many other recipes, not necessarily as a leavening agent but to create healthier alternatives.
Sourdough Starter Improves Digestion
For thousands of years, people have been baking with sourdough, and nowadays, with this skill fading away, people are more prone to digestive problems. It is worth noting that all sprouting things, such as beans, seeds, and grains, contain phytic acid, which inhibits plant sprouting and helps the grains preserve.
Unfortunately, phytic acid can hinder digestion and even cause pain. To reduce phytic acid, seeds need to be soaked in water for at least a day. Why are peas often soaked in water before planting? It’s because soaking helps remove phytic acid and speeds up germination. Without soaking, germination would take significantly longer.
To get rid of phytic acid in flour, a sourdough starter is needed. The lactic acid bacteria in a starter produce phytase during the fermentation process, which breaks down phytic acid within 8-10 hours. As a result, the human body no longer has to struggle with this process. Industrial yeast does not undergo such fermentation.
Another amazing thing the lactic acid bacteria in sourdough starter do is break down gluten. Baked goods made with sourdough contain significantly less gluten, which allows many people who can’t tolerate gluten to consume sourdough products but not yeast-risen ones. However, individuals with celiac disease still require completely gluten-free food, and in severe cases, even consuming sourdough-fermented baked goods is not possible for them.
Terminology Related to Sourdough Starter
Sourdough starter
This is an active bubbling bacteria that has been fed within the last 12 hours and can be used to leaven baked goods. An active starter doubles in size within at least 4 hours after feeding.
Sourdough discard
This is an inactive, unfed, “sleeping” remaining starter that does not leaven baked goods but can be used as a substitute for regular flour and water in recipes. It works well, for example, in pancake batter. Here, you will find different recipes to bake using sourdough discard.
Discarding sourdough starter
To feed the sourdough starter, it is necessary to remove approximately ⅔ of the starter. Without discarding, a starter would grow exponentially since water and flour are added to a starter in a 1:1:1 ratio.
For example, if there are 100g of starter in the jar, you add 100g of flour and 100g of water. Now the jar contains 300g of starter. If you don’t discard before the next feeding, you will need to add 300g of water and 300g of flour. After two feedings, you would end up with 900g of starter from the initial 100g. By discarding ⅔ of a starter each time, exponential growth is prevented.
Occasionally, there may be a need for a larger amount of starter for baking. In such cases, increasing the starter significantly can be achieved by feeding it multiple times.
Feeding sourdough starter
To activate the starter, it needs to be “fed.” This means removing (generally) ⅔ of the starter and adding back an equal amount of water and flour (hence the 1:1:1 ratio). The bacteria living in the starter crave fresh flour and water as their food source. After feeding, the strong and vigorous starter will double (sometimes even triple) in size within at least 4 hours.
You can even feed the starter in a 1:5:5 ratio, for example, if the starter has become very weak. In this case, it’s good to give it “more food.” A starter begins to weaken after about 12 hours, and after that, we no longer refer to it as active.
Hooch
This liquid might appear on the surface of the starter, and it can be transparent or even gray or black. It is separated alcohol and is not harmful. You can pour it off or mix it back into the starter. When this liquid appears on the surface of the starter, it’s a sign that the starter has become very weak and needs feeding.
Kahm yeast
Sometimes, a neglected starter can develop a yeast-like substance that resembles mold in appearance. This is not harmful and can be discarded from the surface of the starter, allowing you to continue using it as usual.
When Has Sourdough Starter Gone Bad?
It is very difficult to kill your homemade sourdough starter. It is incredibly resilient and can sometimes survive in the refrigerator without feeding for up to a year (still, not recommended and very risky).
When actively using the starter, its lifespan is infinite. However, there are situations where the starter is no longer suitable for consumption.
Mold on the starter – If the starter develops mold, it is best to discard it and make a new starter. Mold doesn’t appear easily, so there is no need to excessively worry.
To prevent mold, it’s advisable to occasionally feed or at least stir the starter that has been sitting in the refrigerator for a while. It’s also a good idea to clean the container where the starter is stored. I usually clean the starter container when I see that the edges are very dirty and filled with dry starter.
The starter has turned orange – This is a sign of harmful bacteria that are not beneficial to our bodies.
Maintaining Your Homemade Sourdough Starter
- When kept at room temperature, the sourdough starter needs to be fed at least every two days, but preferably once or even twice a day. Feeding at longer intervals is only possible in a very cool room and is extremely risky because the starter can easily spoil when neglected. Feeding at longer intervals also weakens the starter.
- If you don’t want to take care of the starter daily, you can put it in the refrigerator. In the refrigerator, it needs to be fed once every two weeks. If you want to use the starter for baking, you should take it out of the refrigerator a couple of days in advance, but even that is not necessarily required. The important thing is that it is active just before baking!
- The starter can also be dried. When dried, it can be stored for years and even more without any care.
- Sourdough starter DOES NOT NEED access to oxygen to survive. However, it should still be kept in a container that allows air to pass through (a regular jar with a loosely closed lid works well) as if the gas produced during the fermentation process in the starter cannot escape, the pressure inside the container can build up to the same level as in a car tire, and sooner or later the container may explode. Opening the lid under such pressure can cause physical injuries.
- It is a good idea to collect leftover inactive starter in the refrigerator and use it in various recipes. As an inactive starter, it functions like regular flour and water. However, throwing the leftover starter into the compost pile isn’t a waste, the compost pile loves sourdough discard!
- Sourdough starter doesn’t like certain metals, such as silver. Therefore, it is safest to store it in a plastic or glass container and stir it with a wooden spoon. Regular stainless steel spoons are not harmful to the starter and can also be used.

How to Make a Sourdough Starter
Making a sourdough starter takes about a week, but it’s recommended to feed it daily for at least two weeks to ensure its full strength. With a two-week-old starter, you can already bake bread and pastries, sometimes even sooner.
I recommend starting with a kitchen scale rather than measuring cups or, even worse, estimating by eye. Once you’re familiar with the consistency of the starter using a scale, you can switch to estimating, but I still prefer using a scale to avoid mistakes. In the very beginning, don’t use-
What You’ll Need for a Homemade Starter
- Water
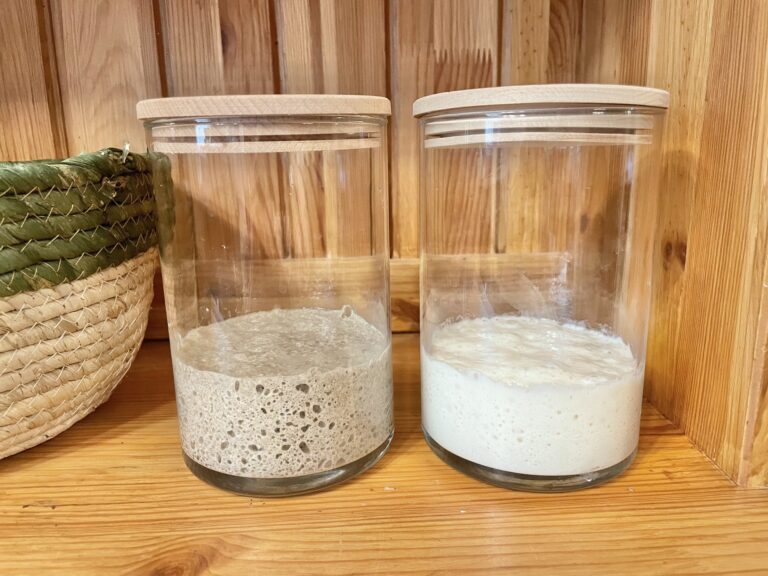
- Flour (any type of flour you prefer; I have two starters at home, one made with rye flour and the other with all-purpose flour)
- A container with a loose lid for storing
- A spoon for stirring (a silver spoon is not suitable)
Step-By-Step Guide for Homemade Sourdough Starter
Don’t make much starter initially. Use small quantities because, in the beginning, you’ll likely have to discard the entire sourdough batch as it’s not suitable for consumption.
Day 1
- In a bowl or clean jar, add 25g of flour and 25g of warm water (room temperature). You can adjust the quantities, but it’s important to have equal parts of flour and water.
- Draw a line on the jar with a marker or use a rubber band around it at the level of the starter. This will help you monitor its growth. But probably nothing significant will happen in the next few days.
- Leave the starter in a warm place for 24 hours to ferment, covered with a loose lid.
Day 2
- Remove half of the starter, approximately 25g, and discard or compost it. It’s not yet suitable for consumption as the beneficial bacteria haven’t fully developed.
- Now, feed the starter in a 1:1:1 ratio. This means adding 25g of water and 25g of flour. You will have 25g of the existing starter, 25g of flour, and 25g of water, totaling 75g of fed starter.
- From now on, each time you feed the starter, remove approximately 2/3 (about 50g) of it, leaving 25g in the jar, and add the same amount of flour and water as in previous days. This will keep the quantity of the starter consistent.
- Leave the starter to ferment for approximately 24 hours in a warm spot.
Day 3
- Your starter may have doubled in volume by now with lots of bubbles in there, but it doesn’t mean it’s strong enough to be used for baking.
- You may notice unpleasant odors coming from the starter. It can have various repulsive smells, but that’s normal and will soon disappear.
- Feed the starter again and leave it to ferment for another 24 hours.
Days 4-7
- If you notice signs of activity in your starter, such as bubbles and growth, you can start feeding it every 12 hours, which means twice a day.
- If your starter hasn’t shown signs of activity yet, feed it every 24 hours. Otherwise, you might slow down the maturing process.
- During this time, your starter may react differently – sometimes it will rise, sometimes it won’t, and its smell may vary. A sourdough starter is a funny creature that can be challenging to fully understand without scientific knowledge!
Continue feeding the starter twice a day until it doubles in volume within at least 4 hours (it can happen even faster). This indicates that the starter has reached maturity, and you can now bake with it!
The Float Test
The float test doesn’t work! Many sources are suggesting performing the float test before using a sourdough starter, but unfortunately, it’s not reliable.
The float test involves taking a little bit of sourdough starter and placing it in water. If the sourdough floats in the water, it is considered active and ready to use. However, if it sinks, it is not mature enough.
So, why doesn’t this test work? Indeed, a strong active sourdough starter often floats in the water. However, this depends largely on the flour. For example, a sourdough starter made of 100% whole wheat flour may not float because of its different texture. If the mature sourdough starter is briefly stirred with a spoon, its density immediately changes, and it will sink. This doesn’t mean that the starter is unusable.
The sourdough starter can still be used even if it sinks when stirred, as the natural yeast in it is the leavening agent, and it won’t be affected.

Ideas and Tips
- If you accidentally run out of sourdough starter or spill it, even a super tiny amount can be enough to start a new batch.
- Whole-grain flour may result in a thicker starter because it tends to absorb more water. For example, my rye starter made with whole grain flour has a thicker consistency.
- Do not change the type of flour during the starter’s maturing process. You can switch flours once the starter is fully matured. Otherwise, the starter will weaken, and you’ll have to start over again with the weak starter.
- Avoid pouring sourdough discard (especially if made with white flour) down the sink. When the starter dries in the pipes, it can harden like cement, making it challenging, if not impossible, to clean the plumbing.
- Sourdough baked goods don’t have to be sour! You can adjust the flavor to your liking, ranging from tangy to almost indistinguishable from yeast-based products.
- Sourdough starter is not very sensitive to cold or heat. Therefore, depending on your needs, you can feed it with either warm or cold water.
- If the tap water in your area is not drinkable, definitely use bottled water or filtered water, as tap water can affect sourdough bacteria.
Baking with sourdough is a fun experience! Here you will find recipes for sourdough rye bread and for these amazing sourdough cinnamon rolls.


How to Make a Sourdough Starter from Scratch
Maintaining your own homemade sourdough starter is an ancient skill that unfortunately is fading away in today's world. The process of making a sourdough starter is actually quite simple, and a most traditional starter is made with just two ingredients: water and flour.
Ingredients
- Water
- Flour (any type of flour you prefer; I have two starters at home, one made with rye flour and the other with wheat flour)
- A container with a loose lid for storing
- A spoon for stirring (a silver spoon is not suitable)
Instructions
Don't make much starter initially. Use small quantities because, in the beginning, you'll likely have to discard the entire sourdough batch as it's not suitable for consumption.
Day 1
- In a bowl or clean jar, add 25g of flour and 25g of warm water (room temperature). You can adjust the quantities, but it's important to have equal parts of flour and water.
- Draw a line on the jar with a marker or use a rubber band around it at the level of the starter. This will help you monitor its growth. But probably nothing significant will happen in the next few days.
- Leave the starter in a warm place for 24 hours to ferment, covered with a loose lid.
Day 2
- Remove half of the starter, approximately 25g, and discard or compost it. It's not yet suitable for consumption as the beneficial bacteria haven't fully developed.
- Now, feed the starter in a 1:1:1 ratio. This means adding 25g of water and 25g of flour. You will have 25g of the existing starter, 25g of flour, and 25g of water, totaling 75g of fed starter.
From now on, each time you feed the starter, remove approximately 2/3 (about 50g) of it, leaving 25g in the jar, and add the same amount of flour and water as in previous days. This will keep the quantity of the starter consistent. - Leave the starter to ferment for approximately 24 hours in a warm spot.
Day 3
- Your starter may have doubled in volume by now with lots of bubbles in there, but it doesn't mean it's strong enough to be used for baking.
You may notice unpleasant odors coming from the starter. It can have various repulsive smells, but that's normal and will soon disappear. - Feed the starter again and leave it to ferment for another 24 hours.
Days 4-7
- If you notice signs of activity in your starter, such as bubbles and growth, you can start feeding it every 12 hours, which means twice a day.
If your starter hasn't shown signs of activity yet, feed it every 24 hours. Otherwise, you might slow down the maturing process. - During this time, your starter may react differently - sometimes it will rise, sometimes it won't, and its smell may vary. A sourdough starter is a funny creature that can be challenging to fully understand without scientific knowledge!
Continue feeding the starter twice a day until it doubles in volume within at least 4 hours (it can happen even faster). This indicates that the starter has reached maturity, and you can now bake with it!
Nutrition Information:
Yield: 1 Serving Size: 1Amount Per Serving: Calories: 455Total Fat: 1gSaturated Fat: 0gTrans Fat: 0gUnsaturated Fat: 1gCholesterol: 0mgSodium: 12mgCarbohydrates: 95gFiber: 3gSugar: 0gProtein: 13g