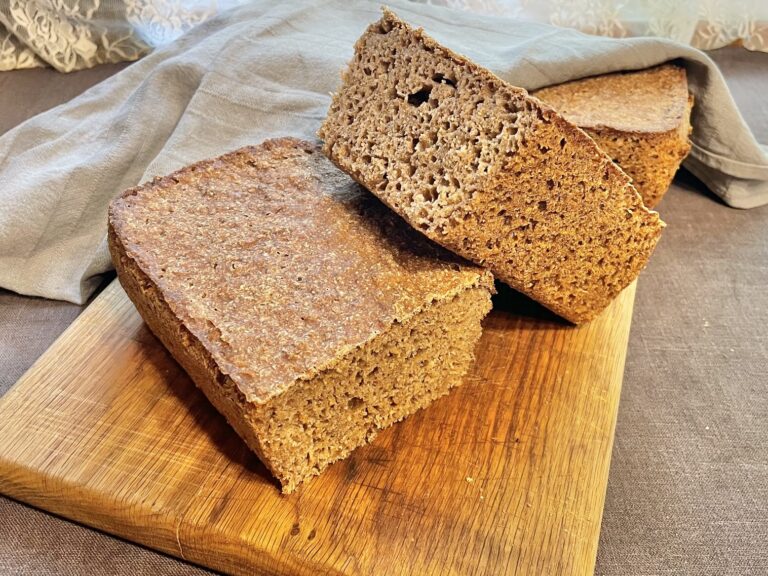
I promise you, by following this recipe, you’ll end up with the best sourdough cinnamon rolls ever. They’re incredibly delicious, soft, and delightful. These dreamy sourdough cinnamon rolls are made with as health-conscious ingredients as possible and leavened with wild yeast, making the dough much easier for the body to digest than commercial yeast-leavened dough.

Before starting, come and follow me on Instagram, Facebook, and Pinterest!
It’s best to allow two days to make these cinnamon rolls. Although it can be done in one day, you’ll need to start baking relatively early in the day because the rolls need to rise twice, with the first rise lasting at least 8 hours.
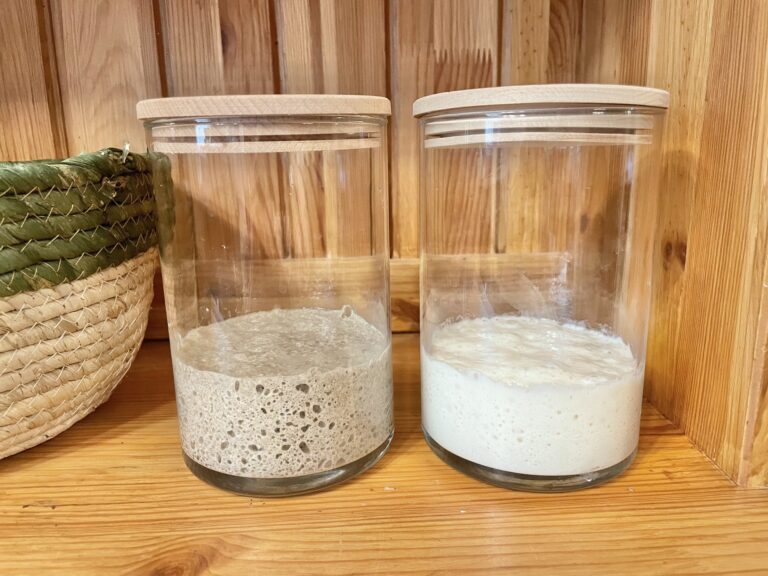
Active Sourdough StarterTo make the cinnamon rolls rise, you’ll need an active sourdough starter. If you haven’t used a starter before, you can find instructions for making one in this post. If you’re just starting to make a starter from scratch, keep in mind that it takes about two weeks for the starter to become mature and strong.
Take at least 25g of inactive starter or sourdough discard, add 25g of water and 25g of flour, and if the starter doubles in volume within four hours, it’s still active for about 8 hours, and during that time, you can start baking.
Storing Cinnamon RollsThe best way to store cinnamon rolls is to wrap them in a kitchen towel at room temperature or in a cloth bread bag. This keeps them soft for several days, although they usually disappear before that. However, if you want to make a larger quantity of cinnamon rolls, you can freeze them. Of course, you may also keep them in the fridge, but it might change their texture.
Freezing Cinnamon RollsYou can freeze cinnamon rolls after baking if you find that you have too many leftovers, or you can freeze them before the final proof. To do this, prepare the cinnamon rolls as usual, but instead of allowing them to be proofed on the baking sheet, place them in the freezer. Initially, I recommend freezing them individually so they don’t stick together. Once they’re frozen, you can transfer them to a container. Cinnamon rolls keep very well in the freezer.
To bake them later, take the cinnamon rolls out of the freezer, let them thaw, and proof them at room temperature overnight. Then, when the rolls are puffy, put them in the oven, and you won’t even notice they were frozen in the meantime! This makes it easy to make a delicious breakfast with little effort.
FAQWhat is brioche dough, and what is it used for?
Brioche dough is wonderful, soft, and melt-in-your-mouth dough! Brioche dough can be used to make a variety of things: burger buns, various sweet and savory pastries, braided bread, and even sandwich bread! Brioche dough typically contains milk, eggs, and butter. These three components make the dough especially soft and flavorful.
Why make cinnamon rolls with sourdough?Sourdough contains many beneficial lactic acid bacteria. These bacteria break down phytic acid found in grains, making the baked goods easier for the body to digest. Additionally, sourdough baked goods have a much lower gluten content than products leavened with commercial yeast. Again, it’s the lactic acid bacteria that break down gluten during the fermentation process, making it possible for gluten-sensitive persons to enjoy bread products. For these processes to be effective, the dough should ferment for at least 8-12 hours.
Are sourdough-leavened baked goods sour?Yes and no. It depends on your preference. Following this recipe, the dough won’t develop a sour taste. However, some people enjoy tangy baked goods. For that, simply allow the dough to ferment in the refrigerator for a day or two. This prolongs the fermentation process, but the dough won’t rise too quickly in the cold environment.
What happens if the dough rises/proofs for too long?Dough that has risen for too long and over-fermented is quite challenging to work with and may even fail for certain baked goods. Signs of over-fermented dough include a sour taste and a liquid, unmanageable consistency. However, don’t throw away over-fermented dough. You can use it, for instance, to make focaccia. I’ve had brioche dough over-ferment before. It was very warm inside, and due to unfavorable circumstances, my dough rose for approximately 16 hours, definitely too long. However, I added plenty of flour to the work surface and managed to roll out the dough and make cinnamon rolls. The rolls had a slightly tangy taste, but it wasn’t a problem. My husband even praised them, saying they were exceptionally soft on the bottom!
At what temperature should you proof the dough?The warmer the room, the faster the dough rise time is, and vice versa. Therefore, if you want the dough not to rise too quickly (for example, if proofing overnight), keep it somewhere not too cold but slightly cooler. And if you want the rolls to be ready as soon as possible, place them in a warm place. However, keep in mind that butter begins to melt inside the dough when the temperature reaches 27°C (80°F) or higher. This is also something to keep in mind when baking on hot summer days. Therefore, it’s not advisable to proof butter-containing dough in too warm a place (such as on a heated floor). The dough should rise for at least 8 hours to allow the lactic acid bacteria to provide maximum benefit. However, if this isn’t a goal in itself, very warm temperatures can cause the dough to rise in as little as 4-6 hours.

Below are two options for baking cinnamon rolls, so you’ll have a rough idea of the times involved. When baking with sourdough, it often happens that if you start too late mixing the dough, you’ll end up needing to put the dough in the oven in the middle of the night… because if the dough proofs for too long, the baking process can go wrong. I’ve had to put bread in the oven in the middle of the night, or at 3 a.m., transfer the dough to the proofing basket.
Starting in the Morning10:00 PM (the day before) – Feed the sourdough starter
8:00 AM – Mix all the ingredients and let sit (autolyze) for 20 minutes.
8:20 AM – Knead the dough and leave it in the bowl to rise for 8-12 hours.
6:00 PM – Prepare the cinnamon rolls, place on a baking sheet, and let rise at room temperature for 2-4 hours.
8:00 PM – Bake the cinnamon rolls for 20 minutes in the oven.
8:20 PM – Optionally, prepare glaze and pour over the baked rolls.
Starting in the Evening
5:00 PM – Feed the sourdough starter
9:00 PM – Mix all the ingredients and let sit (autolyze) for 20 minutes.
9:20 PM – Knead the dough and leave it in the bowl to rise for 8-12 hours.
8:00 AM – Prepare the cinnamon rolls, place them on a baking sheet, and let them rise at room temperature for 2-4 hours.
10:00 AM – Bake the cinnamon rolls for 20 minutes in the oven.
10:20 AM – Optionally, prepare glaze and pour over the baked rolls.
Cinnamon Roll GlazeThe cinnamon roll glaze is entirely optional. Often, I skip it altogether. But sometimes, it’s lovely to enjoy cinnamon rolls with a mild glaze. Based on personal taste, I recommend using sugar (preferably raw sugar) rather than honey. I’ve tried making it with honey, but the taste of honey is quite strong, and I didn’t particularly like it. However, taste preferences vary, so I still encourage trying it out! You can find the recipe for the glaze in this post.
IngredientsCheck the recipe card below the post for ingredient quantities and nutritional value.
Active sourdough starter
Whole milk or raw milk
All-purpose flour or bread flour
Honey (or sugar)
Unsalted butter – softened or melted butter isn’t necessary.
Salt
Eggs

How to Make Cinnamon Rolls
- Mix all the ingredients. Initially, the dough doesn’t have to be uniform and elastic, but the ingredients need to be more or less evenly mixed.
- Let the dough rest (autolyze) for 20 minutes. During this time, the liquid absorbs the flour, and the dough becomes smoother, more elastic, and easier to knead.
- Start kneading the dough. For this, I often use the Rubaud method, which works very well. When the dough is elastic and passes the windowpane test, there’s no need to knead it further. The dough should not stick to your hands and should come away completely from the sides of the bowl.
- First rise (or bulk fermentation): when the dough is ready, let it rise for 8-12 hours. The dough should roughly double in height. For more information on how to properly proof the dough, please refer to the FAQ.
- Dust your work surface and the dough with flour before rolling. This makes it easier to handle even quite a liquid dough.
- Roll out the proofed dough as a large rectangle. Don’t roll the dough too thinly, it won’t help achieve better results and may even have the opposite effect. The thickness of the dough should be about 3-5mm.
- Spread a thin layer of softened butter over the entire rolled-out dough. If you have cold butter (I always forget to let it soften), I recommend grating it over the dough!
- Now, add cinnamon and sugar. Don’t be stingy with the sugar. There’s a night-and-day difference in cinnamon rolls when there’s too little sugar versus just enough. I use brown unrefined cane sugar, and although sugar certainly doesn’t belong strictly on the list of recommended foods, I always use quite a generous amount for desserts. Let’s make dessert sweet! After adding sugar and cinnamon mixture, you’ll hardly see any light spots on the dough.
- Roll the dough into a roll from the long side of the dough. If the dough breaks, you’ve rolled it too thinly, and that… – you can correct it next time.
- Cut pieces from the dough roll – about 5-7cm long. You can use a sharp knife, thread, or even dental floss.
- Place the cut dough piece upright on the surface and press it flat to form the shape of a cinnamon roll.
- Grease the baking sheet with butter to prevent the cinnamon rolls from sticking.
- Place the cinnamon rolls on the baking sheet or cake pan. Leave gaps between the rolls because they’ll rise significantly.
- Second rise: leave the rolls to rise for 1-3 hours. If desired, you can skip the final rise, but for the best results I recommend letting them rise, then they will be even softer and airier.
- Optionally, brush the cinnamon rolls with a beaten egg solution. This won’t leave a taste but will give the rolls a nice shine.
Preheat the oven to 180°C (350°F) and bake the cinnamon rolls for about 20 minutes or until they’re nicely golden brown on top.

Ideas and Tips
- Old folks say that if you replace the milk in the dough with buttermilk, the cinnamon rolls will be exceptionally soft.
- Before rolling out the dough, generously flour the work surface and the dough itself! You won’t taste the flour, but it significantly simplifies the process.
- You can optionally dust the cinnamon rolls with powdered sugar.
- If you want to use a stand mixer to mix the dough, be sure to use the dough hook attachment and mix at low speed to avoid overheating the machine.
Whether you’re already an experienced sourdough baker or this is your first attempt, I’m confident you’ll bake a tray of wonderful-tasting fluffy sourdough cinnamon rolls, and they’ll disappear faster than you can imagine!


The Best Sourdough Brioche Cinnamon Rolls Recipe
I'm confident you'll bake a tray of wonderful-tasting fluffy sourdough cinnamon rolls, and they'll disappear faster than you can imagine!
Ingredients
- 250g of all-purpose flour or bread flour
- 75g of sourdough starter
- 25g of honey (or sugar)
- 5g of salt
- 50g of butter
- 100g of milk
- 50g of egg (one chicken egg)
Instructions
- Mix all the ingredients. Initially, the dough doesn't have to be uniform and elastic, but the ingredients need to be more or less evenly mixed.
- Let the dough rest (autolyze) for 20 minutes. During this time, the liquid absorbs the flour, and the dough becomes smoother, more elastic, and easier to knead.
- Start kneading the dough. For this, I often use the Rubaud method, which works very well. When the dough is elastic and passes the windowpane test, there's no need to knead it further. The dough should not stick to your hands and should come away completely from the sides of the bowl.
- First rise (or bulk fermentation): when the dough is ready, let it rise for 8-12 hours. The dough should roughly double in height. For more information on how to properly proof the dough, please refer to the FAQ.
- Dust your work surface and the dough with flour before rolling. This makes it easier to handle even quite a liquid dough.
- Roll out the proofed dough as a large rectangle. Don't roll the dough too thinly, it won't help achieve better results and may even have the opposite effect. The thickness of the dough should be about 3-5mm.
- Spread a thin layer of softened butter over the entire rolled-out dough. If you have cold butter (I always forget to let it soften), I recommend grating it over the dough!
- Now, add cinnamon and sugar. Don't be stingy with the sugar. There's a night-and-day difference in cinnamon rolls when there's too little sugar versus just enough. I use brown unrefined cane sugar, and although sugar certainly doesn't belong strictly on the list of recommended foods, I always use quite a generous amount for desserts. Let's make dessert sweet! After adding sugar and cinnamon mixture, you'll hardly see any light spots on the dough.
- Roll the dough into a roll from the long side of the dough. If the dough breaks, you've rolled it too thinly, and that... – you can correct it next time.
- Cut pieces from the dough roll - about 5-7cm long. You can use a sharp knife, thread, or even dental floss.
- Place the cut dough piece upright on the surface and press it flat to form the shape of a cinnamon roll.
- Grease the baking sheet with butter to prevent the cinnamon rolls from sticking.
- Place the cinnamon rolls on the baking sheet or cake pan. Leave gaps between the rolls because they'll rise significantly.
- Second rise: leave the rolls to rise for 1-3 hours. If desired, you can skip the final rise, but for the best results I recommend letting them rise, then they will be even softer and airier.
- Optionally, brush the cinnamon rolls with a beaten egg solution. This won't leave a taste but will give the rolls a nice shine.
- Preheat the oven to 180°C (350°F) and bake the cinnamon rolls for about 20 minutes or until they're nicely golden brown on top.
Notes
- Old folks say that if you replace the milk in the dough with buttermilk, the cinnamon rolls will be exceptionally soft.
- Before rolling out the dough, generously flour the work surface and the dough itself! You won't taste the flour, but it significantly simplifies the process.
- You can optionally dust the cinnamon rolls with powdered sugar
- If you want to use a stand mixer to mix the dough, be sure to use the dough hook attachment and mix at low speed to avoid overheating the machine.
Nutrition Information:
Yield: 12 Serving Size: 1Amount Per Serving: Calories: 175Total Fat: 4gSaturated Fat: 2gTrans Fat: 0gUnsaturated Fat: 2gCholesterol: 25mgSodium: 199mgCarbohydrates: 29gFiber: 1gSugar: 2gProtein: 5g