Traditional homemade rye sourdough bread might initially seem like a huge, lengthy, and complicated undertaking. However, the reality is quite different. Once you’ve baked sourdough rye bread a few times, you won’t even need to look at the recipe anymore. Black bread is incredibly rich in nutrients, and thanks to the fermentation process, it contains beneficial bacteria for the body. Rye flour contains less gluten than wheat flour, making rye bread potentially suitable for those sensitive to gluten. In this article, I will provide more information about everything you need to know about baking rye bread at home and share my experiences with potential mistakes.

While rye bread is widely known worldwide, it is primarily a staple in Northern and Eastern Europe. Among Estonians, rye bread holds a special place and is considered a traditional national dish. Authentic rye bread is made with rye sourdough and does not contain yeast or wheat flour. However, you can add almost anything you fancy to your rye bread: raisins, nuts, seeds, malt flour, or extract (which gives the bread a darker color), barley flour, and more. Since our daddy prefers to eat plain dark bread, I have gotten used to making classic rye bread with malt flour and without any additives. I usually bake rye bread once or twice every two weeks.
Before starting, come and follow me on Instagram, Facebook, and Pinterest!
How to Choose a Loaf Tin
Finding a suitable loaf tin is important. I use loaf tins that can accommodate large 1kg loaves. There are also smaller ones for making approximately 600g loaves. I wrote this recipe for baking around an 800g loaf. Loaf tins come in metal, silicone, and ceramic materials. I use ceramic ones.
The dough should fill about one-third to half of the loaf tin so that there is enough room for it to rise. If there’s too much dough in the loaf tin, it may not rise fully, and the rye bread will turn out dense and chewy inside.
Baker’s Percentage
The baker’s percentage is widely used among sourdough bakers, but I have also used it in other recipes. Understanding it is very helpful! Let me explain what the baker’s percentage is and how to use it.
How to Calculate the Baker’s Percentage
As the name suggests, you need to have basic knowledge of percentage calculations to use the baker’s percentage. You can find an overview of percentage calculations on this website.
Now, when percentages are usually calculated based on the total, the baker’s percentage means that it is calculated based on the amount of flour. This is necessary to establish one quantity in the recipe as constant because we don’t know the whole. The easiest way is to calculate based on the amount of flour since it is the largest quantity. It might sound complicated, but let me give you an example.
Conventional percentage calculation: The recipe calls for 150g of flour, 90g of water, and 3g of salt. What percentage does water represent from this total amount? The conventional percentage calculation would involve adding up the total (150+90+3=243), and based on the total, you can determine that water represents 37% of this recipe.
Baker’s percentage calculation: The recipe calls for 150g of flour, 90g of water, and 3g of salt. What percentage does water represent from this total amount? In the baker’s percentage calculation, you don’t add up the total, but instead, you calculate everything based on the amount of flour. So, the amount of flour (150g) equals 100%. This means that water accounts for 60% of the total in this recipe.
Why is the Baker’s Percentage Needed?
Great question! Let’s go back to the same example. The recipe calls for 150g flour, 90g water, and 3g salt. Please create a similar recipe but with 370g flour. You will likely notice that the baker’s percentage is essential for composing this recipe, right? Now you can easily calculate how much 60% of water is when the flour quantity is 370g. The answer is 222g of water. You can calculate the salt quantity in the same way, and there you have it—a new and impressive recipe!
Once you have learned the baker’s percentage, you’ll need it all the time! I also use the baker’s percentage when writing rye bread (and other baked goods) recipes.

What You’ll Need to Make Rye Bread
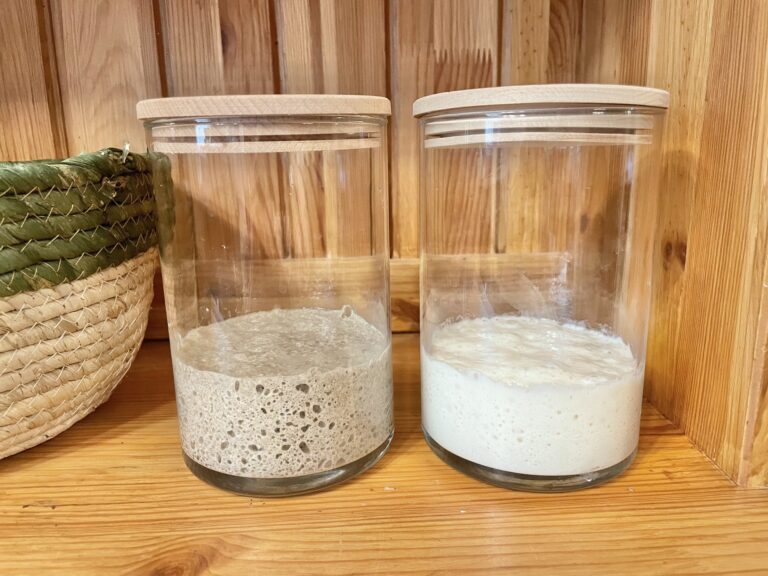
Rye sourdough starter – Sourdough is a crucial component in making homemade bread. Here, you can find a detailed guide on making traditional sourdough with just two ingredients: water and flour. If you only have white wheat flour sourdough at home, you can easily turn it into a nutritious rye sourdough with a few feedings.
Rye flour – I prefer using dark rye flour instead of fine-grind sifted rye flour. Whole grain rye flour contains bran, which enhances the nutritional value of the bread. However, you can successfully use both types of flour for making bread.
Malt flour or malt extract – Malt is not necessary, but it adds a darker color to the bread. Malt extract gives the bread an even darker color compared to malt flour.
Water
Sugar or honey – I have used brown sugar, white sugar, and honey for bread making. All three work well and give the bread the necessary sweetness.
Salt
Additions – Optionally, you can add your favorite additions to the bread: caraway seeds, pumpkin seeds, nuts, raisins, etc.
Mixing bowl for fermenting the dough
Loaf pan
Butter – Butter is needed to grease the pan, ensuring the bread comes out easily.

How to Make Rye Bread
While browsing the internet, I noticed that many housewives make rye bread in completely different ways. Breadmaking is a process where there is no right or wrong way to do it. If it turns out well, then it’s the right way! This recipe has evolved over many baking sessions, and I have adjusted it to fit my style, tastes, and even my oven. I hope my recipe inspires someone to bake traditional homemade rye bread!
Making rye flour loaf differs significantly from making white flour loaf. The main difference occurs right at the beginning—when making dough for wheat bread, you need to use an active sourdough starter, but for making rye bread, the sourdough starter doesn’t have to be active because it becomes active during the dough-making process. However, you can also use an active sourdough starter, and it won’t make any difference.
Using my method, making bread takes a couple of days but often less than that. If you want to have bread in the evening, start the bread-making process in the previous evening. If you prefer it in the morning, start in the previous morning. In reality, I have also made “quick bread” that can be ready in approximately 7 hours. But I will explain that in more detail below. Here is a step-by-step tutorial on how to make fresh bread without commercial yeast, using your sourdough starter.
Making the Pre-Dough
- Take the sourdough starter and place it in a bowl for the bread dough. If possible, feed the remaining starter and return it to the refrigerator or another storage place. You can find all the information about storing the starter in the same article I also previously linked.
- Now add warm water and half of the specified amount of rye flour to the bowl. The pre-dough now has a hydration of 200% (assuming you use a starter with equal amounts of water and flour). The pre-dough can be slightly more or less liquid, which doesn’t directly affect the rye bread-making process. If you ever want to make bread by instinct without precise measurements, it’s good to know how the consistency should be when measuring by weight.
- Take a large bowl and mix the water, flour, and rye starter with your hand or a spoon. Small lumps of flour in the pre-dough are fine.
- The bulk fermentation time of pre-dough is 4-12 hours at room temperature. The fermentation time depends on the desired sourness of the bread and your time constraints. The longer the bread ferments, the more sour it becomes. However, if you ferment the bread for less than 4 hours, it won’t rise during baking because the starter hasn’t become active yet. On the other hand, fermenting the bread for more than 12 hours can weaken the starter again, and the bread may not rise as well. I usually ferment the bread for about 8-10 hours, mostly overnight.
- If you leave the pre-dough to ferment uncovered, the coating will form on top. To avoid this, I use a simple trick: I place the bowl of dough into the closed oven, a lid isn’t necessary at all. It provides enough moisture around it, and no coating forms. If using the oven is not an option, you can cover the bowl with a regular pot or pan lid that is large enough, a damp tea towel (a dry towel won’t work), or come up with other solutions!

Making the Bread Dough
- A well-fermented pre-dough will have a frothy, bubbly surface (looking a bit like a beer), taste sour, and might have risen slightly.
- Now add the remaining amount of flour, salt, sugar, or honey, and any ingredients you would like to add to the recipe. If you want to use another type of flour (e.g., barley or malt flour), replace part of the rye flour with your desired flour. Your rye bread dough now has a hydration of 100%, which, in my opinion, is an excellent consistency for rye bread. If the dough is too liquid, it will remain raw inside, and if it is too thick, the bread won’t rise well.
- Mix the dough thoroughly by hand to combine all the ingredients. If you prefer, you may use a stand mixer.
- Coat the bread pan with butter (I never use parchment paper) and transfer the bread dough into the pan.
- Since it’s a pretty sticky dough, smooth the dough inside the pan gently with wet hands (to prevent it from sticking to your hands).
- As earlier, place the loaf tin into the closed oven to allow the dough to proof, or cover the bread with a damp kitchen towel. It’s important to make sure that the top of the dough doesn’t touch the towel after rising because the rye dough will be fragile, and the bread may collapse.
- Proofing time of the bread in a warm place (25°C, 75°F) is about 2-3 hours, making the bread-making process particularly fast. If proofing in a cooler environment, it takes approximately 6-10 hours. The timing depends on the temperature, which is difficult to predict accurately. The bread is ready to bake when it has risen at least one-third, preferably half.
Baking the Bread
- The end of rye bread-making is approaching, and interestingly, the baking phase can vary for many people. Based on my experience, the golden rule is this: The bread wants to go into a hot oven (at least 200°C, 400°F). If you put the bread in a cooler oven, it will likely collapse. After that, you can start lowering the temperature. I like to bake bread at a lower temperature, but it’s a point of experimentation for everyone!
- If you proofed the bread in the oven, carefully remove the risen loaf from there. Handle the risen bread gently because the dough is fragile and can easily collapse.
- Preheat the oven to 200°C (400°F).
- If desired, you can place a pot of hot water in the bottom of the oven to create some steam, which results in a slightly softer loaf, and since a crust doesn’t form as quickly on top of the loaf, it allows for better rising.
- Place the bread into the preheated oven on the middle rack and lower the temperature to 160°C (320°F).
- Allow the bread to bake for 70-90 minutes. It’s important to ensure that the bread doesn’t get too brown towards the end of baking.
- When the rye bread is done, remove it from the oven and let it cool in the pan. Be careful not to remove the bread from the pan while it’s still too hot, as it may crumble and not come out easily. However, if the bread is allowed to cool for too long until it no longer steams, it will become soggy on the bottom and won’t taste as good.
- Once the bread has cooled slightly, transfer it to a cutting board and cover it with a damp towel. This prevents the bread crust from becoming too hard when it cools – again, it’s a matter of personal preference.

Ideas and tips
- Bread ferments longer in cooler spaces and faster in warmer. For example, if you find yourself in a situation where the bread needs to ferment for more than 12 hours (for instance, if you know you won’t be home on time), it’s worth moving the bread to a cooler room right away: a pantry, cellar, or even the refrigerator. Keep in mind that the refrigerator significantly slows down the fermentation process. Before trying out these tricks, make sure you are familiar with your starter!
- If you take the starter out of the refrigerator before making the pre-dough, you can safely add 3-4 hours to the fermentation process because the starter needs some time to adjust to the environmental change.
- Finished bread can also be frozen, allowing you to prepare a larger quantity in advance if desired.
- You don’t need a large work surface to make great rye bread. Spare space for a bowl for mixing the dough is more than enough.
- You may cool the bread on a wire rack so that the loaf won’t become soggy.
- There is no need to add bread flour or other white flour. Whole rye bread works the best!
As you can imagine, there’s a lot of room for creativity and improvisation in the bread-making process. Use a kitchen scale, at least in the beginning, to get a rough idea of what homemade bread entails. After that, feel free to work with the dough more intuitively. It’s also important to remember that even if something goes wrong (such as the bread not rising properly or adding a bit too much flour), the rye bread is usually still edible after baking. So, never give up halfway through!


The Best Sourdough Rye Bread Recipe (Easy and Rustic)
Baking traditional rye bread at home might initially seem like a huge, lengthy, and complicated undertaking. However, the reality is quite different. Once you've baked sourdough rye bread a few times, you won't even need to look at the recipe anymore.
Ingredients
- 80g of rye sourdough starter
- 400g of rye flour
- 2 tbsp of malt flour or extract (optional)
- 400g (ml) of water
- 40g of sugar or honey
- 8g of salt
- Butter (to grease the loaf pan)
Instructions
Making the Pre-Dough
- Take the sourdough starter and place it in a bowl for the bread dough. If possible, feed the remaining starter and return it to the refrigerator or another storage place. You can find all the information about storing the starter in the same article I also previously linked.
- Now add warm water and half of the specified amount of rye flour to the bowl. The pre-dough now has a hydration of 200% (assuming you use a starter with equal amounts of water and flour). The pre-dough can be slightly more or less liquid, which doesn't directly affect the rye bread-making process. If you ever want to make bread by instinct without precise measurements, it's good to know how the consistency should be when measuring by weight.
- Take a large bowl and mix the water, flour, and rye starter with your hand or a spoon. Small lumps of flour in the pre-dough are fine.
- The bulk fermentation time of pre-dough is 4-12 hours at room temperature. The fermentation time depends on the desired sourness of the bread and your time constraints. The longer the bread ferments, the more sour it becomes. However, if you ferment the bread for less than 4 hours, it won't rise during baking because the starter hasn't become active yet. On the other hand, fermenting the bread for more than 12 hours can weaken the starter again, and the bread may not rise as well. I usually ferment the bread for about 8-10 hours, mostly overnight.
- If you leave the pre-dough to ferment uncovered, the coating will form on top. To avoid this, I use a simple trick: I place the bowl of dough into the closed oven, a lid isn't necessary at all. It provides enough moisture around it, and no coating forms. If using the oven is not an option, you can cover the bowl with a regular pot or pan lid that is large enough, a damp tea towel (a dry towel won't work), or come up with other solutions!
Making the Bread Dough
- A well-fermented pre-dough will have a frothy, bubbly surface (looking a bit like a beer), taste sour, and might have risen slightly.
- Now add the remaining amount of flour, salt, sugar, or honey, and any ingredients you would like to add to the recipe. If you want to use another type of flour (e.g., barley or malt flour), replace part of the rye flour with your desired flour. Your rye bread dough now has a hydration of 100%, which, in my opinion, is an excellent consistency for rye bread. If the dough is too liquid, it will remain raw inside, and if it is too thick, the bread won't rise well.
- Mix the dough thoroughly by hand to combine all the ingredients. If you prefer, you may use a stand mixer.
- Coat the bread pan with butter (I never use parchment paper) and transfer the bread dough into the pan.
- Since it's a pretty sticky dough, smooth the dough inside the pan gently with wet hands (to prevent it from sticking to your hands).
- As earlier, place the loaf tin into the closed oven to allow the dough to proof, or cover the bread with a damp kitchen towel. It's important to make sure that the top of the dough doesn't touch the towel after rising because the rye dough will be fragile, and the bread may collapse.
- Proofing time of the bread in a warm place (25°C, 75°F) is about 2-3 hours, making the bread-making process particularly fast. If proofing in a cooler environment, it takes approximately 6-10 hours. The timing depends on the temperature, which is difficult to predict accurately. The bread is ready to bake when it has risen at least one-third, preferably half.
Baking the Bread
- The end of rye bread-making is approaching, and interestingly, the baking phase can vary for many people. Based on my experience, the golden rule is this: The bread wants to go into a hot oven (at least 200°C, 400°F). If you put the bread in a cooler oven, it will likely collapse. After that, you can start lowering the temperature. I like to bake bread at a lower temperature, but it's a point of experimentation for everyone!
- If you proofed the bread in the oven, carefully remove the risen loaf from there. Handle the risen bread gently because the dough is fragile and can easily collapse.
- Preheat the oven to 200°C (400°F).
- If desired, you can place a pot of hot water in the bottom of the oven to create some steam, which results in a slightly softer loaf, and since a crust doesn't form as quickly on top of the loaf, it allows for better rising.
- Place the bread into the preheated oven on the middle rack and lower the temperature to 160°C (320°F).
- Allow the bread to bake for 70-90 minutes. It's important to ensure that the bread doesn't get too brown towards the end of baking.
- When the rye bread is done, remove it from the oven and let it cool in the pan. Be careful not to remove the bread from the pan while it's still too hot, as it may crumble and not come out easily. However, if the bread is allowed to cool for too long until it no longer steams, it will become soggy on the bottom and won't taste as good.
- Once the bread has cooled slightly, transfer it to a cutting board and cover it with a damp towel. This prevents the bread crust from becoming too hard when it cools - again, it's a matter of personal preference.
Nutrition Information:
Yield: 1 Serving Size: 1Amount Per Serving: Calories: 2448Total Fat: 20gSaturated Fat: 8gTrans Fat: 0gUnsaturated Fat: 8gCholesterol: 31mgSodium: 3230mgCarbohydrates: 515gFiber: 53gSugar: 92gProtein: 64g