This easy macrame plant hanger is so beautiful that you just have to try making it yourself. What I love about this macrame plant holder is that we use 100% cotton rope for everything—even the hanging hook is braided from a rope.

At first glance, it might seem like macrame is complicated and starting the process is daunting, but in reality, if you know how to tie your shoelaces, you can do macrame!
What is Macrame?
Macrame is the art of knotting cords together to create beautiful patterns, ornaments, or practical items.
Macrame likely originated around the 13th century, but it could date back even further. Initially, artisans used macrame techniques to finish the edges of woven textiles, preventing the fabric from unraveling.
Sailors also practiced macrame in their spare time and sold their handmade creations on land.
Why Make Macrame?
Macrame is one of the simplest and most affordable crafts to try. For example, you could order or purchase 100 meters of cord and use it to make three gorgeous hanging planters without needing anything else.
Macrame also provides quick results. The knotting process is fast, making it highly inspiring and motivating. For instance, this hanging planter only takes an hour or two to complete.
You can easily do art of macrame while taking care of kids. I do various types of crafts, and I have to say macrame is one of the most “kid-friendly” crafts to work on.
For example, when sewing, it could be difficult to stop in the middle of a process if a child needs attention. But with macrame, you can pause at any moment since the knots won’t unravel, and you won’t lose your place.
Creating Macrame Patterns
Macrame is a very creative activity, there are so many different ways to do macrame. So designing your own patterns is surprisingly easy. Unlike knitting, where creating patterns can be quite challenging for beginners, macrame patterns quickly make sense once you gain a little experience and learn the basic knots.
You’ll soon know which knots to use, where to place them, and how the patterns will turn out.

What’s the Right Cord for Macrame?
The choice of cord largely depends on what you want to make. For a plant hanger, a thinner or medium-thick cord works well. However, if you’re making something like a swing or an item that needs to bear a lot of weight, you’ll need a thicker cord.
Macrame cords come in three types: single chord, three-ply chord, and braided chord. For this guide, you can use any of these, though the photos feature a single cord.
Macrame knotting
I recommend knotting your plant hanger while it hangs on a hook so it stays vertical as you work. But once, when I was sick and couldn’t get out of bed, my spouse brought me the macrame project, and I successfully worked on it while lying in bed with the macrame resting on my lap.
If possible, hang your macrame at eye level. If it’s too high, your arms will tire, if it’s too low, your back will ache. Of course, a little workout for your arms isn’t a bad thing!

FAQs
Can I substitute the knots in this pattern with other knots?
Yes, you can! Changing the knots won’t significantly alter the amount of cord you need. Just keep in mind that some knots use more of the outer cords, while others use more of the middle cords.
Can I undo a pattern if I make a mistake?
Yes, it’s easy to undo knots. I’ve even done this intentionally to experiment with different styles, untying the knots if they didn’t look quite right.
What kinds of knots are good for designing macrame plant hangers?
This guide includes a variety of simple knots. At first, I thought the selection might be too diverse, but my husband loved the final result and said I shouldn’t change a thing. That said, you can create a beautiful plant hanger using just one or two types of knots.
You can find a great selection of knot tutorials in this guide, but there are countless other knots you can discover or invent with your creativity.
Where can I buy macrame cord?
You can find it at various craft stores or order it online.
Is a DIY plant hanger a good first macrame project?
Yes, it’s a simple project and a great option for your first macrame attempt!
Ideas and Tips
- Use firm pressure when tying knots, and aim to make all knots equally tight so the cord wears evenly.
- If you like, next time you can incorporate wooden beads into your design—they’re often used in macrame projects.
- Don’t stress about measuring every centimeter precisely. Macrame is a very freeform art with plenty of room for improvisation.
- Instead of a braided ring, you can also use a metal ring or wooden ring.

Tools and materials
5 mm macrame cord – single-twist, three-ply twist, or braided cords all work.
Sharp scissors – while you could use a knife to cut the cord, scissors are much easier to handle.
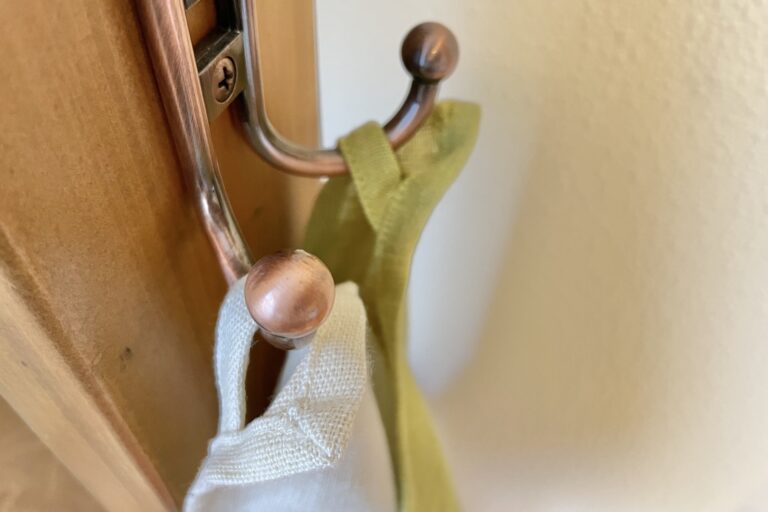
Hanging hook – it’s best to knot the macrame on a hook, but you could also use a hanger attached to a curtain rod.
A small piece of tape – this is optional but can help secure the cords to a table when starting.
Measuring tape or ruler
A short piece of string, ribbon, or cord – for temporary marking
A smaller pot – or similar item to measure the size of the holder
Ceiling hook
How to Make a Macrame Plant Hanger
First Section: Braided Ring
Prepare the cords
- Measure and cut eight 3.6-meter (11.9 ft) long cords. The easiest way to do this is by using a 1-meter stick placed on your work surface. Alternatively, you can tape a measuring tape to the table to keep it stable.

- Also, cut a shorter piece of cord, about 60 cm (2 ft) long, for later use.
Mark the cords
- Now comes one of the most tedious parts of this whole process. Take all the long cords, find their midpoint, hang them up, and pull on the cords so they end up roughly the same length. A few centimeters here or there won’t make a difference.

- Measure 7 cm (3 in) down from the center in one direction. Mark this spot using a small piece of yarn or thread.

Prepare for braiding
- Remove the macrame setup from its hook (or wherever it is hanging) and lay it flat on a table or work surface.
- Since you measured 7 cm (3 in) from the center in one direction, some cords are longer than others.
- Place the longer strings closer to you and the shorter strings further away. If desired, secure the strings to the table with tape, but this is optional.
Start braiding
- Divide the strings closest to each other into four pairs.

- Take the first pair on the right and cross it over the left pair next to it.

- Then, take the third pair from the right and cross it over the left pair.

- Next, cross the left-middle pair over the right-middle pair.

- Repeat this pattern a total of 12 times.

Wrapping knot
- Remove the marking thread and bring both ends of the braid together to form a loop.

- Make the loop with the 60 cm (2 ft) string you prepared earlier. Wrap the short string tightly around the braided ends six times from top to bottom, leaving a small loop at the bottom. Pass the remaining string through the loop.


- Hold the bottom end tightly, and pull the top end until the loop disappears.


- Tuck any loose ends inside.

Middle Section
Divide the strings
Separate the strings into four groups, with four strings in each group. Each group will be knotted in the same way.

Left-facing square knots
- Take the left cord and pass it over the two center strings, then under the rightmost string. Pull the knot tight.


- Next, take the rightmost string and pass it over the two center strings, then under the leftmost string. Pull the knot tight.


- Repeat this process 10 times for each group of cords.

Left half-square knots
- Leave about three fingers’ width (roughly 2 inches) of empty space below the first set of knots.

- Make spiral knots by passing the leftmost string over the two center strings and under the rightmost string (the first half of a previous square knot).
- Repeat this knot 20 times. This will create a spiral effect.

- Repeat for all groups.
Overhand Knots
- Leave about three fingers’ space width again below the first set of knots.
- Tie a simple overhand knot and tighten it gently.


- Adjust the position as needed to ensure all knots are at the same height in each group of cords.
Left half-square knots
- Leave the same amount of space as before.

- Then take four adjacent strings and adjust the position so that shorter strings are on the sides and longer ones in the center. We do this to use up the cords evenly. But if you’ve calculated the ribbons with some extra, then you don’t need to worry about it and can skip this step.
- Make spiral knots again as before.
- Repeat this knot 20 times.
- Repeat for all groups.
Bottom of the Plant Hanger
Create the Bottom Knots
- Divide each string group in half, forming eight smaller groups.
- Take two strings and pass the left string over the right, then pull the right string through the loop.

- Reverse the direction, passing the right string over the left, then pulling the left through the loop.

- Repeat this alternating pattern five times for each pair.

Reconnect the Groups
Before we start working on the base, let’s reconnect the groups of eight and put them back into groups of four. But do this with an offset to create a kind of net or basket for the plant pot.
Left-Facing Square Knot
To connect the groups, we’ll do one round of the first knot: move the left cord over the two middle cords, then under the right cord, and pull the knot tight. Move the right cord over the two middle cords, then under the left cord, and pull the knot tight.

Position the Pot
- Place the plant pot (or a similar-sized object) into the macrame holder. Hold all the strings together at the bottom to prevent the pot from falling.
- Adjust the pot and strings until the pot sits straight and evenly.

Tie the Final Knot
- Gather all the strings at the bottom and tie them together in a single overhand knot. Adjust the strings as needed to ensure the pot stays level. If it doesn’t, untie it and try again.

- Once positioned correctly, pull this large knot tight by tightening each cord individually.

Trim the Ends
- Cut the remaining strings at the bottom to your desired length.

- For a neat finish, you can brush out the string ends with a hairbrush for a fringe effect or leave them as-is – a beautiful long tail.
Now you’ve completed your first handmade macrame plant hanger! I bet you’ll agree—it wasn’t as difficult as it seemed. So, order some more cords and dive into the wonderful world of macrame!

DIY Macrame Plant Hanger for Beginners (Easy Tutorial)
Materials
- 5 mm macrame cord - single-twist, three-ply twist, or braided cords all work.
- A short piece of string, ribbon, or cord - for temporary marking
- Ceiling hook
- A small piece of tape - this is optional but can help secure the cords to a table when starting.
Tools
- Sharp scissors - while you could use a knife to cut the cord, scissors are much easier to handle.
- A smaller pot - or similar item to measure the size of the holder
- Hanging hook - it's best to knot the macrame on a hook, but you could also use a hanger attached to a curtain rod.
- Measuring tape or ruler
Instructions
First Section: Braided Ring
Prepare the strings
- Measure and cut eight 3.6-meter (11.8 ft) long cords. The easiest way to do this is by using a 1-meter stick placed on your work surface. Alternatively, you can tape a measuring tape to the table to keep it stable.
- Also, cut a shorter piece of cord, about 60 cm (2 ft) long, for later use.
Mark the strings
- Divide the strings in half and measure 7 cm (3 in) down from the center in one direction. Mark this spot using a small piece of yarn or thread.
Prepare for braiding
- Remove the macrame setup from its hook (or wherever it is hanging) and lay it flat on a table or work surface.
- Since you measured 7 cm (3 in) from the center in one direction, some cords are longer than others.
- Place the longer strings closer to you and the shorter strings further away. If desired, secure the strings to the table with tape, but this is optional.
Start braiding
- Divide the strings closest to each other into four pairs.
- Take the first pair on the right and cross it over the left pair next to it.
- Then, take the third pair from the right and cross it over the left pair.
- Next, cross the left-middle pair over the right-middle pair.
- Repeat this pattern a total of 12 times.
Wrapping knot
- Remove the marking thread and bring both ends of the braid together to form a loop.
- Secure the loop with the 60 cm (2 ft) string you prepared earlier. Wrap the short string tightly around the braided ends six times from top to bottom, leaving a small loop at the bottom. Pass the remaining string through the loop.
- Pull both ends of the wrapping string tightly to secure the knot, then trim any excess.
- Tuck any loose ends inside.
Middle Section
Divide the strings
- Separate the strings into four groups, with four strings in each group. Each group will be knotted in the same way.
Left-facing square knots
- Take the left cord and pass it over the two center strings, then under the rightmost string. Pull the knot tight.
- Next, take the rightmost string and pass it over the two center strings, then under the leftmost string. Pull the knot tight.
- Repeat this process 10 times for each group of cords.
Left half-square knots
- Leave about three fingers’ width (roughly 2 inches) of space below the first set of knots
- Make spiral knots by passing the leftmost string over the two center strings and under the rightmost string.
- Repeat this knot 20 times. This will create a spiral effect.
- Repeat for all groups.
Overhand Knots
- Leave again about three fingers’ width of space below the knots.
- Tie a simple overhand knot and tighten it gently.
- Adjust the position as needed to ensure all knots are at the same height in each group of cords.
Left half-square knots
- Leave the same amount of space as before, then take four adjacent strings and adjust the position so that shorter strings are on the sides and longer ones in the center.
- Make spiral knots as before.
- Repeat this knot 20 times. This will create a spiral effect.
- Repeat for all groups.
Bottom of the Plant Hanger
Create the Bottom Knots
- Divide each string group in half, forming eight smaller groups.
- Take two strings and pass the left string over the right, then pull the right string through the loop.
- Reverse the direction, passing the right string over the left, then pulling the left through the loop.
- Repeat this alternating pattern five times for each pair.
Reconnect the Groups
- Before we start working on the base, let's reconnect the groups of eight and put them back into groups of four. But do this with an offset to create a kind of net or basket for the plant pot.
Left-Facing Square Knot
- To connect the groups, we'll do one round of the first knot: move the left cord over the two middle cords, then under the right cord, and pull the knot tight. Move the right cord over the two middle cords, then under the left cord, and pull the knot tight.
Position the Pot
- Place the plant pot (or a similar-sized object) into the macrame holder. Hold all the strings together at the bottom to prevent the pot from falling.
- Adjust the pot and strings until the pot sits straight and evenly.
Tie the Final Knot
- Gather all the strings at the bottom and tie them together in a single overhand knot.
- Adjust the strings as needed to ensure the pot stays level. If it doesn’t, untie it and try again.
- Once positioned correctly, pull this large knot tight by tightening each cord individually.
Trim the Ends
- Cut the remaining strings at the bottom to your desired length.
- For a neat finish, you can brush out the string ends with a hairbrush for a fringe effect or leave them as-is - a beautiful long tail.